
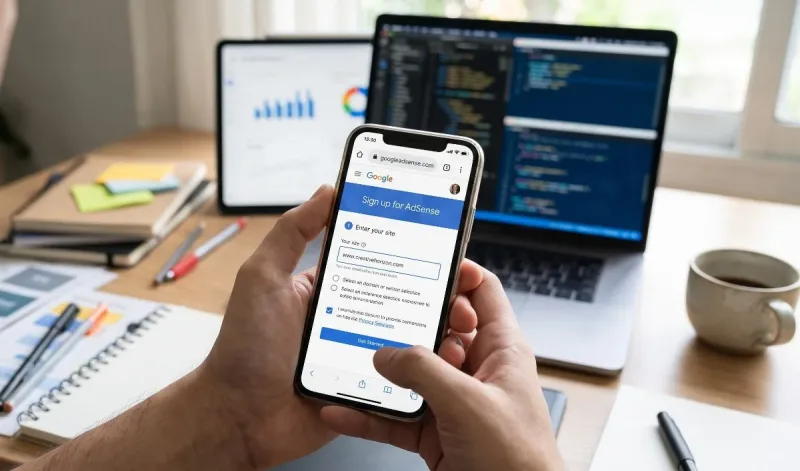
Monetizing written content and digital platforms starts with selecting an ad network with reliable advertiser demand. While affiliate marketing, sponsored posts, and direct brand partnerships are effective monetization paths, Google AdSense remains the industry standard for publishers building automated display and native ad revenue.
The setup process requires attention to detail. Google enforces strict platform policies, and applying prematurely can lead to swift rejections citing "low-value content" or policy non-compliance.
Whether launching a WordPress niche blog, a custom PHP web application, or an online utility tool, this guide covers how to create google adsense account properly, optimize your site for fast review approval, and configure your payment infrastructure for reliable monthly earnings.
What Is Google AdSense and How Does It Function?
Google AdSense connects website publishers with advertisers bidding via Google Ads and third-party demand-side platforms (DSPs).
When you place AdSense code onto your website, Google runs an automated, real-time micro-auction every time a page loads. The advertiser willing to bid the highest rate for that user's impression or click wins the placement.
Key Mechanics:
-
The Revenue Split: For standard AdSense for content, Google distributes approximately 68% of recognized ad earnings to the publisher while retaining roughly 32%.
-
Impression & Click Pricing: AdSense operates primarily on a Cost-Per-Mille (CPM—earnings per 1,000 ad impressions) and Cost-Per-Click (CPC) foundation, factoring in audience geography, content niche, and contextual relevance.
-
No Direct Sales Overhead: You do not negotiate with brands, generate commercial invoices, or configure individual display creatives. Google automates ad delivery, creative formats, and payout distribution.
Pre-Application Checklist: Meeting Approval Standards
Before creating an account, your site must comply with Google's publisher quality guidelines. Submitting a half-built site or an empty domain causes review bottlenecks.
                  ┌──────────────────────────────────────────────┐
                  │      AdSense Pre-Approval Requirements       │
                  └──────────────────────┬───────────────────────┘
                                         │
         ┌───────────────────────────────┼───────────────────────────────┐
         ▼                               ▼                               ▼
┌──────────────────┐           ┌──────────────────┐           ┌──────────────────┐
│ Legal Compliance │           │ Technical Health │           │ Editorial Depth  │
│ - Privacy Policy │           │ - Clean SSL/HTTPS│           │ - 20-30 Articles │
│ - Terms of Use   │           │ - Fast Core Vitals│          │ - Unique Content │
│ - About/Contact  │           │ - Mobile Friendly│           │ - Logical Nav    │
└──────────────────┘           └──────────────────┘           └──────────────────┘
1. Mandatory Legal Pages
Google’s automated crawlers prioritize transparency. Your site must feature dedicated, accessible links in the main navigation or footer:
-
Privacy Policy: Must disclose cookie usage, third-party advertising partners (mentioning Google AdSense explicitly), and tracking technologies.
-
Terms of Service / Terms of Use: Outlines usage guidelines, user agreements, and disclaimers.
-
About Us Page: States who owns, writes, and manages the site.
-
Contact Us Page: Displays a real, monitored contact channel (a working contact form, direct email address, or corporate entity details).
2. High-Value, Original Content
AdSense will reject websites populated with thin content, scraped RSS feeds, or spun summaries.
-
Depth: Aim for 25 to 35 well-researched, original articles that genuinely solve a user search query.
-
Search Intent: Content should show clear human value, structure (H2/H3 tags, bullet points), and distinct topical focus.
-
Prohibited Niches: Content involving hacking tools, cracked software, weapons, unauthorized pharmaceuticals, adult material, or copyright infringement will result in an immediate application ban.
3. Domain Maturity and Technical Foundation
-
Top-Level Custom Domain: Apply using your root domain (
example.com), not a free subdomain (example.wordpress.comorexample.blogspot.com), unless applying directly via Blogger’s native earnings dashboard. -
Mobile Responsiveness: Ensure standard mobile navigation works cleanly without broken layout containers or overlapping elements.
-
Core Web Vitals: A fast-loading site with clean layout stability prevents bot-crawling timeouts during Google's automated site inspection.
Step-by-Step: How to Create a Google AdSense Account
Once your site meets foundational standards, follow this step-by-step setup walkthrough.
Step 1: Open the AdSense Registration Portal
-
Open your browser and navigate to adsense.google.com/start/.
-
Click Get Started in the top right corner.
-
Choose the Google account (Gmail or Google Workspace) you want associated with your publisher dashboard.
Important: Google permits only one individual AdSense account per person. If you previously set up an approved AdSense account with another email address, log into that original account and add your new site there rather than creating a duplicate, which triggers a policy hold.
Step 2: Input Your Domain Information
-
Your Site URL: Enter your root URL without
http://orhttps://(e.g.,yoursite.com). Do not include subdirectories (e.g.,[yoursite.com/blog](https://yoursite.com/blog)). -
If you do not have a live site yet, you can select “I don’t have a site yet,” but you cannot monetize or request full account activation without connecting an active web property.
Step 3: Choose Performance Suggestions and Country
-
Email Preferences: Select “Yes, send me customized help and performance suggestions” to receive updates regarding policy changes, earnings optimization, and crawler issues.
-
Payment Country/Territory: Select the country where you legally reside and maintain banking ties.
-
Critical: You cannot change your country profile later inside AdSense. Your address must match your physical location, as Google sends a physical postal PIN to this address to verify your account.
-
Step 4: Accept Terms and Complete Registration
Review the Terms of Service, check the confirmation box, and click Start using AdSense. You will be redirected to the AdSense account setup dashboard.
Connecting Your Site to Google AdSense
Your account is now registered, but it is not yet active. To complete activation, you must verify your identity, set up payment records, and embed verification tags on your site.
1. Fill Out Customer Payment Information
-
On your AdSense home screen, click Enter information under the Payments card.
-
Account Type: Select Individual or Business. If you operate as a registered corporate LLC or agency, select Business; solo creators and independent web publishers should select Individual.
-
Enter your legal name (matching your government-issued ID), permanent residential address, and an active phone number.
2. Connect Your Site via the AdSense Code Snippet
-
Click Connect site on your dashboard.
-
AdSense generates a unique JavaScript snippet formatted like this:
<script async src="https://pagead2.googlesyndication.com/pagead/js/adsbygoogle.js?client=ca-pub-XXXXXXXXXXXXXXXX"
     crossorigin="anonymous"></script>
-
Copy this snippet and place it between the
<head>and</head>tags of your website's HTML template.-
For WordPress Users: Use an injection plugin (such as WPCode or your theme’s built-in header scripts area) or insert it into your child theme’s
header.phpfile. -
For Custom Frameworks (PHP / HTML): Paste the tag into your primary global header include template.
-
-
Return to your AdSense dashboard, check the box confirming: "I've placed the code," and click Verify / Request Review.
What to Expect During the Review Process
Once requested, Google’s automated crawlers—and occasionally human policy evaluators—inspect your domain.
-
Review Timeline: Approval typically takes between 48 hours to two weeks.
-
Keep Code Live: Do not remove the AdSense code snippet from your site header while the application is under review. Removing it prevents crawlers from confirming site ownership.
-
Continue Publishing: Add 2 to 3 new original articles while the review is pending to show the crawler that the site is active.
Handling Common Application Rejections:
-
"Low-Value Content": Your articles lack sufficient depth, contain thin word counts, or mirror existing search results too closely. Address this by updating thin articles with unique insights, data tables, or media.
-
"Site Down or Unavailable": Google’s crawler hit a 404, DNS error, or aggressive firewall rule. Check your Cloudflare or caching configurations to ensure Googlebot access is not blocked.
-
"Policy Violations / Scraped Material": Ensure all stock photography is credited, eliminate copyrighted video embeds without context, and review your Privacy Policy pages.
Essential Post-Approval Setup: Ads.txt and PIN Verification
Once approved, you will receive an email stating: "Good news, your site is now ready to show AdSense ads." Complete these operational configurations before scaling traffic:
1. Implement the ads.txt File
Google requires publishers to place an ads.txt file in their site's root directory to prevent counterfeit ad inventory:
-
When your dashboard displays an "Earnings at risk" notice, download the generated
ads.txtfile. -
Upload this text file to the public root folder (
public_html/ads.txt) of your hosting server. -
Verify it by visiting
[yoursite.com/ads.txt](https://yoursite.com/ads.txt)in an incognito window. It should return a single line of text containing your publisher ID:Plaintextgoogle.com, pub-XXXXXXXXXXXXXXXX, DIRECT, f08c47fec0942fa0
2. Auto Ads vs. Manual Ad Units
-
Auto Ads: Google uses machine learning to dynamically detect site layouts, injecting responsive banner, anchor, and vignette ads where they perform best. Enable this under Ads > By Site > Auto Ads.
-
Manual Ad Units: For specific page layouts, create custom ad units under Ads > By Ad Unit (Display Ads, In-Article Ads, or Multiplex Grids). Paste the unit-specific shortcodes into your content layout templates.
3. Identity and Address (PIN) Verification
-
Government ID: When your account nears the initial verification threshold (typically $10 in earnings), Google prompts you to upload a scan of your government ID to confirm identity.
-
Postal Mail PIN: Google then mails a physical postcard containing a 6-digit verification PIN to your registered address. Delivery usually takes 2 to 4 weeks depending on international postal systems. Once received, enter the PIN inside the dashboard to clear the payment hold.
AdSense Payment Lifecycle
AdSense runs on a predictable monthly payout schedule:
-
Earnings Finalization: Between the 1st and 3rd of the following month, estimated ad earnings are audited for invalid clicks and finalized in your dashboard.
-
Payout Release: Between the 21st and 26th of each month, Google dispatches electronic funds transfers (EFT) or wire transfers, provided your finalized balance clears the minimum payment threshold ($100 USD or local currency equivalent).
Strict Rules to Prevent Account Termination
AdSense enforces strict automated traffic policing. Avoid these practices to keep your account in good standing:
-
Never Click Your Own Ads: Do not test ads by clicking them. Google tracks IP addresses, browser fingerprints, and engagement times. Self-clicks trigger instant suspension for invalid traffic.
-
Never Incentivize Clicks: Do not write phrases such as "Support us by clicking ads" or place confusing image overlays that trick visitors into misclicking banners.
-
Avoid Suspicious Traffic Sources: Low-grade traffic from pop-under networks, paid safelists, or bot-driven traffic brokers will trigger an automated ad serving limit, dropping your ad impressions to zero.
Setting up an approved account is straightforward when you treat your website as an authoritative, long-term digital publication. Focus first on high-value, original articles, establish clean navigation, and ensure your site displays required legal pages. Once your site infrastructure is solid, connecting your account takes only a few minutes, unlocking a steady and reliable stream of passive ad revenue.
For a complete visual walkthrough covering the interface steps, account creation details, and dashboard navigation, refer to this Full Guide on Setting Up an AdSense Account. This video is directly relevant because it shows the exact screen-by-screen registration steps inside the modern Google AdSense interface.