How to Take a Screenshot on Laptop: The Definitive, Human-Written Guide
Whether you need to preserve an online transaction receipt, capture a memorable moment during a video call, report a software error to technical support, or share a funny snippet from social media, knowing how to take a screenshot on laptop screens is an indispensable everyday digital skill.
Many laptop users still rely on awkward workarounds, like snapping a blurry picture of the laptop screen using a mobile phone. While that works in a pinch, it often produces glare, moiré lines, and poor readability. Your laptop already features sophisticated, integrated utilities capable of capturing pixel-perfect full screens, specific windows, arbitrary freehand shapes, and even complete scrolling documents.
This comprehensive guide covers everything you need to know about capturing screen content across Windows, macOS, and ChromeOS laptops, alongside third-party tools, hardware-specific quirks, and troubleshooting tips.
1. Fast Keyboard Shortcuts for Windows Laptops
Windows notebooks from manufacturers like Dell, HP, Lenovo, ASUS, and Acer come equipped with several built-in keyboard combinations. Depending on your specific model, keyboard layout, and goal, choose the method that best matches your workflow.
The Modern Standard: The Snipping Tool Overlay (Win + Shift + S)
This shortcut provides the cleanest balance between speed and precision on both Windows 10 and Windows 11.
-
Press Windows Key + Shift + S simultaneously.
-
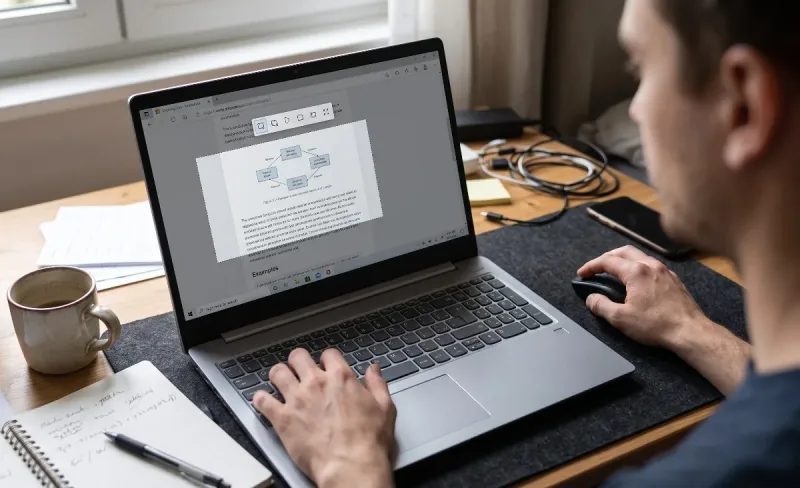
The entire display will dim slightly, revealing a small floating toolbar centered at the top of your display.
-
Select your preferred capture mode:
-
Rectangular Snip: Drag crosshairs to define any box on the screen.
-
Freeform Snip: Draw an irregular perimeter around any object or text block.
-
Window Snip: Hover over an active window or menu and click once to capture it without background distraction.
-
Fullscreen Snip: Immediately captures your entire active monitor array.
-
-
After making your selection, the image is copied instantly to your system clipboard.
-
A popup preview appears in the bottom-right corner of your screen. Clicking this notification launches the full Snipping Tool workspace, allowing you to crop, highlight, add annotations, or draw arrows before saving.
Instant File Auto-Save (Windows Key + PrtScn)
If you are attending an online lecture, a fast-moving webinar, or testing software where you need to take dozens of snapshots in rapid succession without stopping to paste each one:
-
Hold down the Windows Key and tap PrtScn (Print Screen).
-
The display will briefly flicker or dim for a fraction of a second, verifying that the action succeeded.
-
Windows automatically converts the capture into a high-resolution PNG file and names it sequentially (
Screenshot (1).png,Screenshot (2).png). -
To locate your files, open File Explorer, click Pictures in the left sidebar, and select the Screenshots subfolder.
The Quick Clipboard Snag (PrtScn Key Alone)
-
Tap the standalone PrtScn key.
-
The system places a still capture of your entire display onto your clipboard.
-
Switch to an email draft, a document editor like Microsoft Word or Google Docs, or an image editor like MS Paint, and press Ctrl + V to paste the image.
-
Pro Tip for Windows 11 Users: You can map the Print Screen button directly to the modern Snipping Tool interface. Go to Settings > Accessibility > Keyboard and switch the toggle for "Use the Print Screen button to open screen capture" to On.
Capturing Solely the Active Window (Alt + PrtScn)
When multiple programs overlap and you want an isolated visual of just one dialog box or browser window:
-
Click inside the target application window to ensure it is active.
-
Press Alt + PrtScn.
-
Windows captures strictly the boundaries of that active window, excluding the taskbar and desktop backdrop, and sends it directly to your clipboard.
2. Navigating Compact Laptop Keyboard Quirks (The Fn Key)
One of the most frequent hurdles when learning how to take a screenshot on laptop keyboards stems from space-saving designs. Compact laptops—such as 13-inch ultrabooks, 2-in-1 convertibles, and gaming devices—frequently omit a dedicated, full-sized PrtScn key.
Understanding the Function (Fn) Toggle
On many laptops, PrtScn shares physical space with other keys, such as F10, F11, F12, Insert, or the Spacebar. The key often features two labels: the main key in white and PrtScn printed in a smaller font or distinct color (such as blue or orange).
-
If your key looks like this, you must press Fn + PrtScn to trigger the command.
-
To auto-save a full screenshot on these layouts, the combination becomes Windows Key + Fn + PrtScn.
-
To capture an active window, the sequence is Alt + Fn + PrtScn.
If your machine has an Fn Lock key (often located on the Escape key), toggling it changes whether the top row behaves as multimedia/system functions or standard function keys.
What If Your Laptop Has No Print Screen Key at All?
Certain ultra-minimalist keyboards dispense with the key entirely. You still have dependable fallback options:
-
The Snipping Shortcut: Win + Shift + S does not require a Print Screen key.
-
The Windows On-Screen Keyboard: Press Win + Ctrl + O to display the virtual keyboard on your screen. Click the virtual PrtScn button with your trackpad or mouse cursor.
-
Hardware Buttons on 2-in-1 Convertibles: If using a Windows tablet or 2-in-1 hybrid in tent or slate mode, press the physical Power Button + Volume Down Button simultaneously.
3. How to Take Screenshots on Apple Mac Laptops
MacBook Air and MacBook Pro laptops do not have a Print Screen key, but macOS features robust, native capture shortcuts integrated cleanly into the operating system.
Full-Screen Snapshot (Command + Shift + 3)
-
Press Cmd + Shift + 3 at the same time.
-
Your Mac plays a subtle camera shutter audio cue (if sound is enabled), and a small interactive thumbnail slides into the bottom-right corner.
-
By default, macOS deposits the resulting capture directly onto your desktop workspace as a timestamped PNG file.
Selected Portion Capture (Command + Shift + 4)
-
Press Cmd + Shift + 4.
-
Your pointer transforms into crosshairs displaying pixel coordinates.
-
Click and drag over the region you want to capture. Release the trackpad or mouse to complete the snapshot.
-
Window Isolation Trick: While the crosshairs are visible, press the Spacebar. The crosshair turns into a small camera icon. Hover over any open window, dock, or menu bar until it highlights with a translucent blue tint, then click. The system captures the window along with its clean drop shadow.
The Unified Screenshot Utility Bar (Command + Shift + 5)
Introduced in modern macOS versions, this keyboard combination brings up an interactive control HUD:
-
Press Cmd + Shift + 5.
-
An on-screen panel lets you select between capturing the entire screen, capturing a selected window, or cropping a chosen portion.
-
It also includes integrated screen video recording tools.
-
Under the Options menu, you can customize your default save path (Desktop, Documents, Clipboard, or Mail), configure a 5-second or 10-second capture timer, and choose whether to display the mouse pointer.
4. Capturing Screenshots on Chromebook Laptops
Chromebooks running ChromeOS are popular in educational and mobile work environments. Because Chromebook keyboards replace the traditional function row with browser-centric keys, their shortcuts differ from standard PCs:
-
Full Screen: Press Ctrl + Show Windows (the Show Windows key is located on the top row, depicted as a rectangle flanked by two lines, usually situated where
F5sits on a traditional PC). -
Partial Area: Press Ctrl + Shift + Show Windows. The screen dims; click and drag the selection box over your subject area.
-
Screen Capture HUD: Press Ctrl + Alt + Show Windows to open the ChromeOS screen capture bar, offering toggles for still snapshots, video capture, audio input, and save destinations.
-
Locating Chromebook Captures: Open the Files application and browse to the Downloads directory.
5. Capturing Challenging Elements: Menus, Tooltips, and Long Webpages
Some interface elements vanish the second you press a traditional shortcut key. Here is how to handle these edge cases without headaches.
Handling Disappearing Drop-Down Menus
If a hover state, context menu, or right-click dropdown collapses whenever you initiate a keyboard shortcut:
-
Open the Snipping Tool application via the Start menu search bar.
-
Look for the Delay setting (represented by an hourglass or clock icon).
-
Set the timer to 3 or 5 seconds.
-
Click New, quickly switch to your target software, and expand the fragile drop-down menu.
-
Wait for the countdown to expire; the screen freezes cleanly in place, allowing you to crop the visible dropdown menu without it closing.
Capturing Full-Page Scrolling Content
When attempting to document an entire research article, receipt, code repository, or multi-page invoice, a standard screenshot only preserves what is visible within the viewport.
-
In Microsoft Edge: Use the built-in Web Capture feature. Press Ctrl + Shift + S, select Capture full page, and Edge scrolls down the entire webpage automatically, producing an uninterrupted single-image canvas.
-
In Google Chrome: Press F12 to enter Developer Tools, hit Ctrl + Shift + P to bring up the command menu, type
screenshot, and click Capture full size screenshot. Chrome will instantly compile and download a high-definition image of the complete page height.
6. Top Third-Party Utilities for Advanced Needs
If you regularly produce technical documentation, educational coursework, software bug reports, or client training material, dedicated third-party software offers features built-in tools cannot match.
| Tool | Operating System | Standout Features | Best Application |
| ShareX | Windows | Free, open-source, customizable workflows, automated image uploads, color picker, OCR text extraction. | Power users, developers, and power gamers. |
| Snagit | Windows & Mac | Comprehensive editorial suite, sequence step stamps (1, 2, 3), automated sensitive text blurring, video-to-GIF conversion. | Technical writers, project managers, and educators. |
| Lightshot | Windows & Mac | Lightweight footprint, immediate on-screen drawing/arrows, instant cloud image link generation. | Fast casual sharing and basic proofing. |
| Greenshot | Windows | Extremely lightweight, memory-efficient, direct export to Microsoft Office, file, or printer. | Corporate workstations and legacy machines. |
7. Common Troubleshooting Scenarios
Blank, Black, or Grey Captures
If your final image turns out completely black, you are likely encountering Digital Rights Management (DRM) restrictions. Streaming platforms (such as Netflix, Amazon Prime, Hulu, and Spotify) and secure enterprise software intentionally scramble video render buffers to prevent unauthorized copying. To bypass this for legitimate educational or presentation fair-use excerpts, turning off Hardware Acceleration inside your browser settings often restores capture functionality.
Shortcuts Ceasing to Function
If combinations like Win + Shift + S abruptly stop responding:
-
Ensure the Windows Snipping Tool has background app permissions enabled in Windows Settings.
-
Check if your keyboard's gaming mode is turned on; many gaming laptops come with an automatic lock switch that suppresses the Windows Key during gameplay to prevent accidental desktop drops.
-
Restart the Windows Explorer process: Press Ctrl + Shift + Esc, highlight Windows Explorer in the Processes tab, and click Restart.
Quick Reference Summary
-
Windows Modern Crop:
Win + Shift + S -
Windows Auto-Save to Folder:
Win + PrtScn(orWin + Fn + PrtScn) -
Windows Active Window:
Alt + PrtScn -
Mac Full Screen:
Cmd + Shift + 3 -
Mac Custom Window/Area:
Cmd + Shift + 4 -
Mac Capture HUD:
Cmd + Shift + 5 -
Chromebook Full Screen:
Ctrl + Show Windows -
Chromebook Crop:
Ctrl + Shift + Show Windows